Install Pymepix and Pymepixviewer
Required Software:
Python
Git
Some way of installing the requirements.txt in a virtual environment (Here we will use
uv
quelle, alternativepip install .
)
You can change current directory of a terminal with cd relative/path/to/where/you/want/to/go
You can show the contents of the current directory with ls
Create new folder (e.g.
timepix
)Open folder from Step 1 in terminal (e.g.
cd timepix
)Clone both Pymepix and Pymepixviewer into the new folder into two separate repositories
git clone https://gitlab.desy.de/CMI/CMI-public/pymepix.git
git clone https://gitlab.desy.de/CMI/CMI-public/pymepix-viewer.git
Create a virtual environment by running
uv venv
in the terminalActivate the virtual environment in the terminal by running
source .venv/bin/activate
Install the pymepix repository by running
cd pymepix; uv pip install .
Run
uv pip install pyqt5
Install Pymepixviewer by running
cd ../pymepixviewer; uv pip install .
Install git lfs by running
git lfs install
andgit lfs pull
Run a simple test as described in the next chapter to make sure everything works
Done
Usage without hardware camera
Open a terminal and navigate to the folder into which the repositories were cloned, then run
source ~/timepix/.venv/bin/activte; cd timepix/pymepix/pympix/utils
run
python spidrDummyTCP.py
wait
Output should be similar to:
Config file: /path/to/your/timepix/pymepix/pymepix/config/default.yaml
started...
This terminal should be left open while pymepix is used
Open another terminal and navigate to the folder into which the repositories were cloned, then run
source ~/timepix/.venv/bin/activte
run
pymepixviewer
Wait
Now a new window should open, with a couple ui elements. The second terminal should also be left open
To test if evething works:
Open a third terminal, run
source ~/timepix/.venv/bin/activte; cd timepix/pymepix/pympix/utils
Run
python spidrDummyUDP.py --filename="../../tests/files/ion_2595_20240130-1443.raw"
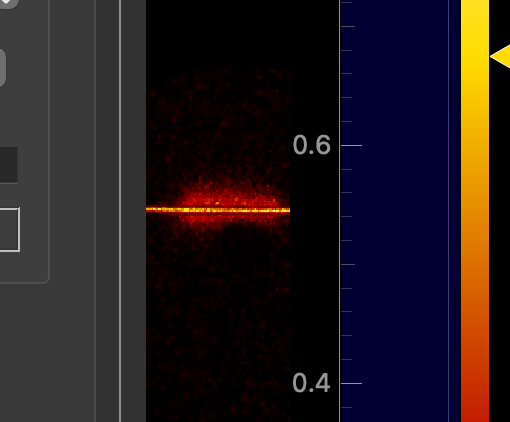
Some new stuff should now be visible in the pymepixviewer.
Done!
Result of the test after step 8:
